5 Simple Steps for Remodeling Your Home
- Alexandra Miller
- Sep 22, 2018
- 4 min read
Updated: Sep 13, 2024
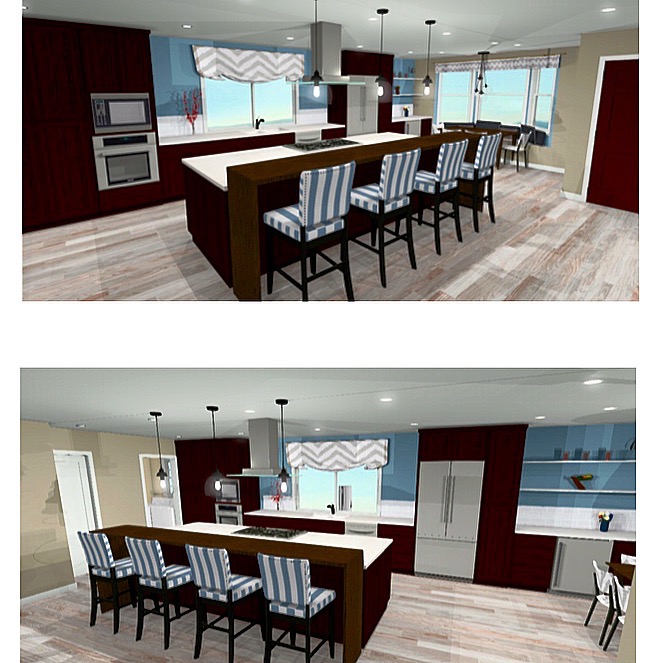
Remodeling your home is a fun and smooth experience thanks to 3D models. With 3D models you can you visualize your new space before you begin renovation. In a 3D model you can see flooring, cabinetry materials, countertops and finishes at every angle. Seeing your renovation before you build it can save lots of time, money and hassle. Below are 5 simple steps you can follow to get you started on your renovation and 3D model.
An experience creative design team can create a 3D models for your project. It’s typically created during initial phase of the remodel process known as the Conceptual Design Phase (CDP). The following is a primer on the CDP followed by a simple 5-step plan to help you begin the phase.
The CDP is an early phase of the design process created to outline the project and identify the space and layout using form and function. And then hone in on the “look” you want. The preliminary phase is necessary to put your project on track. Planning and identifying the components of the project will save you time, money and hassle. With all the beautiful and innovative design possibilities available today a remodel opportunity can seem overwhelming, but it does not need to be a daunting task. Just Follow the 5 steps below and have everything you need to begin your conceptual design and turn your home into your dream home.
1. Create a Collection of things you like! -Conceptual Idea Pics
The best place to start is to collect conceptual design photos and ideas (or cut out magazine photos). This preliminary step can be pleasurable and will help your design team tune into your unique theme. Pinterest is an app and website that has countless ideas for any space you choose to remodel or create. You will want to search floorings, cabinetry, furniture, appliances, plumbing and lighting fixtures, color schemes, backsplashes, and much more. You can also search specific rooms such as kitchens, baths, laundry rooms, living rooms and even outdoor living spaces. If you want a specific style to match your existing home or want to mix things up you can add a style to your search such as contemporary, craftsmen, traditional, modern, French country, etc. The search/shopping process helps you determine the style you want or are most attracted to. Similarly, Houzz is another great source for design ideas.
Start browsing by clicking below:
Pinterest- www.pinterest.com
Houzz- www.houzz.com
As you scroll through all the photos, remember to save, print or share an idea book in order to keep track of all the conceptual styles you love. The more pictures the better! This process can be fun so take as long (or be as quick) as you need…and note that you will know when the search is complete, it is when the hunt no longer yields any appealing new design ideas. After this, it is time to sit down with your designer…
2. Share with your designer
The best way to communicate your ideas to your designer is to meet in person and have the conceptual photos that you have gathered available for review (printed or in your laptop). At this point you do not need to have one set design, the designer will help you with creative suggestions and help you narrow down the project scope, design style and materials, and help you identify your budget and budget limitations.
This meeting with the designer drives the direction you want to head in and helps formulate the “scope of work”. The scope of work is defined as “the area in an agreement where the work to be performed is described; containing any milestones, reports, deliverables, and end products that are expected to be provided by the performing party”. After the scope of work is determined, the designer will then assist in establishing an initial estimated budget “bid” for the project by the contractor(s).
3. Field measure
Next is the field measure. This is when the designer and/or draftsman visits the site to do a field measure of your home or designated space. Depending on the scope they are going to measure the interior, exterior structure, ceiling heights, windows, doors, appliance spaces, notate electrical and plumbing, etc. This typically takes a couple of hours depending on the square footage and size of the project. The field measure permits the drafter to then draw the As-Builts also known as the Existing Floor Plans. Subsequently, the designer works some creative magic to design your dream space by providing you with several conceptual design options, which leads to the next step…
4. Request and preparation of conceptual Plans + 3D models
This phase includes conceptual design development including 3D views and preliminary floor plan options for the remodel or expansion. The designer will help you visualize your new space through their drafting tools, and can also provide color renderings with the 3D views to help in the selection of colors, flooring and cabinetry materials, countertops and finishes once the space planning has been set.
To view samples of such 3D views/perspectives, renderings and floor plans you can visit Miller Design and Drafting at www.millerdd.com
5. Sleep on it.
Take time to think about the plans, give feedback, enhance, reject, accept, finalize and approve.
Designers and drafters are professionals that want to help you develop your dream space. Their job is to help you design, visualize and complete your project in a timely and budget-friendly manner. Design professionals have a broad knowledge of construction, design, functionality and marketability, and know the latest in design and material trends—all the things necessary to a successful remodel and things you may not have time to learn. They can be your guide and facilitate in helping you create a professional and attractive dream home.


Comments